
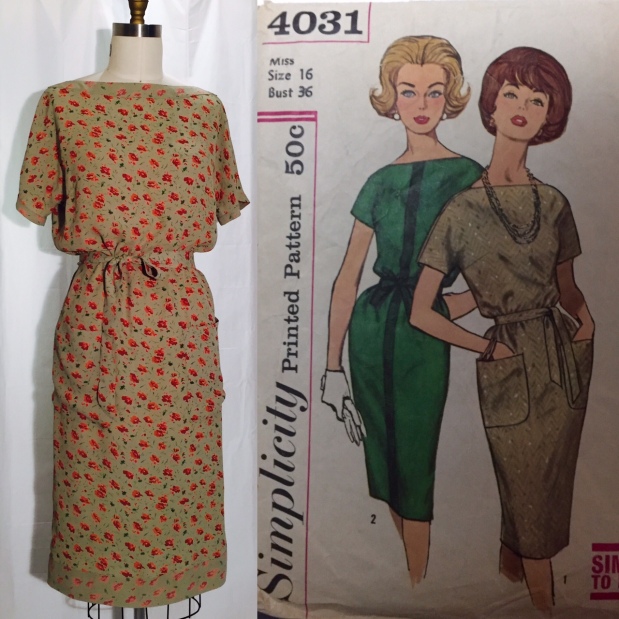
Hi Everyone,
This post took longer then I would have liked, not because it took long to sew this dress but finding the time to write about it. Then why the “question mark” after the title? The fabric! As beautiful as the print and hang are, the “woodgee” (you know what I mean, just moves all over the place!) nature of this 100% rayon fabric (with a crepyness to it) made it a real challenge to cut & sew.
An a little aside … found the fabric at the wardrobe sale for the mini-series “The Secret Life of Marilyn Monroe“. Anybody recognize it?
Of course, as always there were some adjustments I needed to do in order for this dress to look like the sketch on the envelope. First, it seems as always, the hem had a flare in it and although I don’t think that would have looked so bad, I did want it to be more like the sketch. I didn’t make it as pegged as the sketch because the pattern didn’t have a vent/slit in the back hem and thought I would be too narrow to walk. Second, the finished hem was much longer then the sketch (I’m 5′ 9″) but I left it as is because the idea of reworking the hem detail was not something I wanted to do :). Lastly the pattern said this dress needed a CB zipper but when I put one in (invisible zip) and put the belt around the dress, it made the CB seam stick out in such a strange way, I took it out and just sewed up the seam. The neckline was large enough to just slip it over my head, so it was fine.
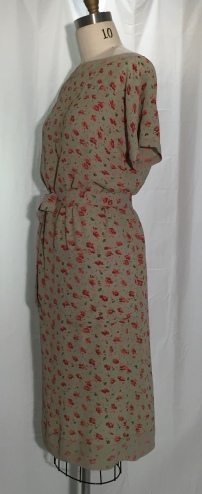
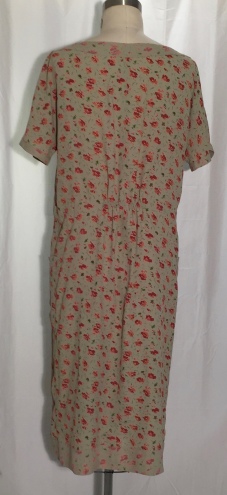
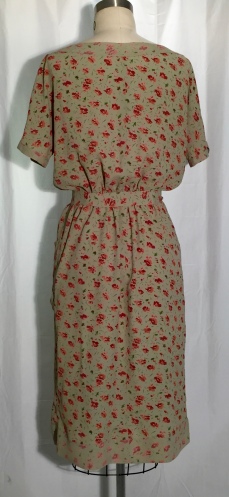
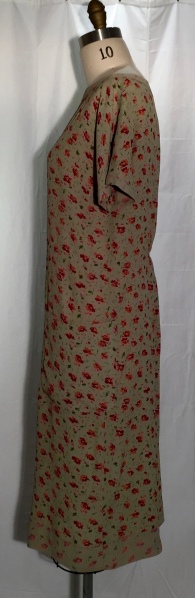
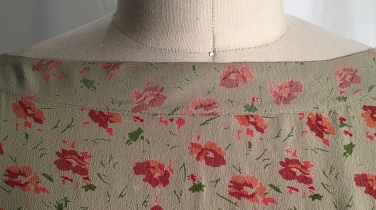
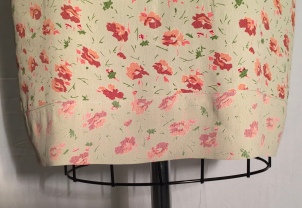
The photos above shows the dress with and without the belt, including an elasticized feature at the back waist I decided to add myself.
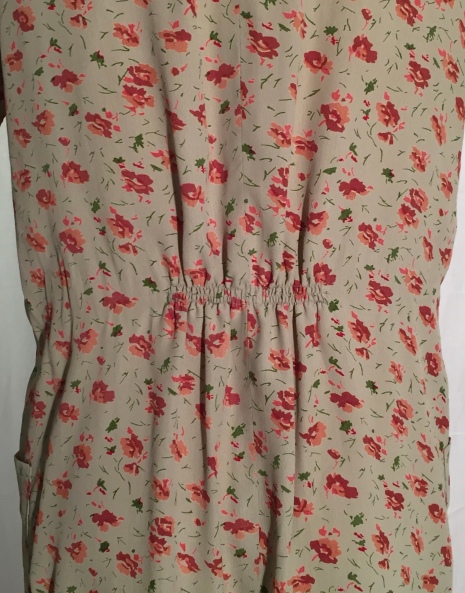
Why and how did I add the elastic feature:
- The pattern instructed the sewer to add a waist casing all the way around. Knowing how “woodgee” the fabric was, trying to do this would probably have made me go crazy or at least go for a drink ;)! When your dealing with fabric like this, it’s difficult to lie flat and try and get a straight line. If you were to try to add a casing, I would suggest to put the garment on and mark the waist as it hangs on you. This isn’t something you could do by yourself, an assistant is needed to mark you’re waist as you stand absolutely still with you’re arms slightly elevated. After that you would then have to decide how much (or the ideal) “blouson” you want and that’s just more trial and error.
- I also wanted to have the option of wearing the dress without the belt but didn’t want it to look like a sac. So I decided to add the CB waist elastic thread detail. It’s simply to do, just wind a bobbin with some elastic thread and stitch as normal (backtack AND hand knot elastic ends, or with time and washing it will come undone). To ensure my 3 elastic stitch lines were level (which were 1/4″ apart from each other), I did sew up the hem first. Just remember to stretch every row as you stitch the next. This will ensure a beautiful gathering appearance.
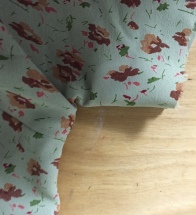
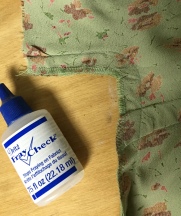
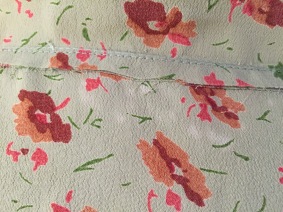
The above pictures show the before and after clipping of the underarm seams. I’m always worried about clipping seams but in this instance there really wasn’t a choice, just don’t do it without your “Fray Check“.
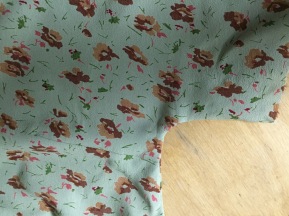
I love when you have to think-outside-of the box and even though my finishings aren’t mindboggling they were not the “norm”. If you look at the first picture above, you’ll see why I said “have to think outside of the box”. After spending what felt like hours making sure the fabric was lying flat on grain before I cut out the pattern and then sewing the garment together I finally noticed (after putting it on the dress from) that the CF neck had these little bleach marks!!! What to do!! ……… Sew the neck facing to the outside! Viola! Bleach spots gone! Again, because of the fabric, it took great care to edgestitch this evenly but very pleased with the end result.
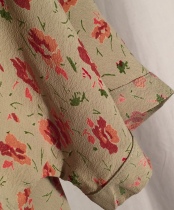
And then to bring all the finishings together, flipped the hem and sleeve allowances to the right side as well. You need to calculate and flip the seam allowances so you don’t see them on the right side, I flipped the seam allowances 1/2″ before the hemline. In the end I love this dress! It’s so me and I’m wearing it tomorrow!
Next pattern:
Looking forward to it. The only crazy thing is I’ve already cut it out using the same fabric as this dress! Have you seen all the details (darts and slit and necktie on the bias) I have to deal with?
Thank God I like a challenge.
